
REVIEW · CYCLING TOURS
Wellington: Remutaka Rail Trail Cycle Tour
Wellington to the Remutaka Range turns into a tunnel-and-bridge day. I love the headlight-lit fell railway experience and the big payoff of reaching a grassy summit for a proper picnic. The route also mixes native bush, information boards, and wide-open Wairarapa farmland views. One thing to consider: the ride includes a narrow, cliffside-feeling descent section, so if you prefer lots of margin and comfort space, you’ll want to judge your bike confidence honestly.
What I also like is how the tour paces the day so you get both history and scenery without feeling rushed. You get a helmeted mountain bike with a repair kit, plus a guide who keeps things friendly and practical (Sam, for example, came prepared to help when weather got tricky). The main drawback is weather and traction: it can be wet, and the day runs unless conditions are unsafe or totally miserable.
In This Review
- Key things that make this tour special
- Entering the Remutaka Rail Trail from Kaitoke
- Tunnels and bridges: the fell railway story you can feel
- The summit plateau picnic, where the day finally slows down
- The descent to Cross Creek: fun, but respect the bike confidence check
- The 2 km single-lane track and why it matters
- Featherston finish: farmland roads and a real local stop
- Getting to and from Wellington without stress
- Bike setup, assist options, and how hard you should train
- What to bring, and how to dress for a tunnel and a picnic
- Price and value: is $119 worth your time
- The guide and organization factor you can feel
- Who should book this Remutaka Rail Trail tour
- Should you book this tour?
- FAQ
- Where are the pickup points in Wellington?
- What time do I get picked up?
- How long is the bike riding and what distance is on the trail?
- Are headlights provided for the tunnels?
- What food is included?
- What should I wear or bring?
- Is the tour cancelled if the weather is bad?
Key things that make this tour special
- Headlights for railway tunnels, so the dark sections are part of the fun, not a risk
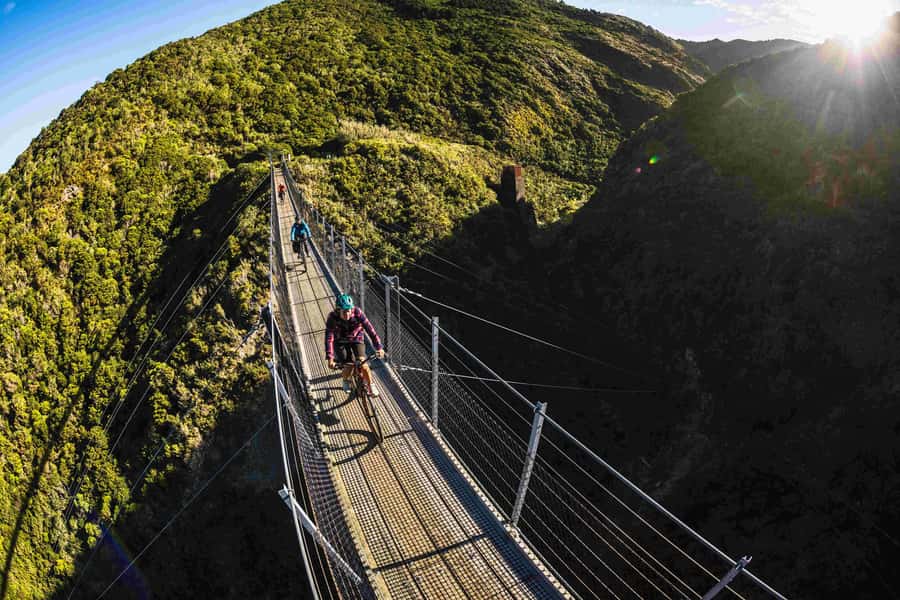
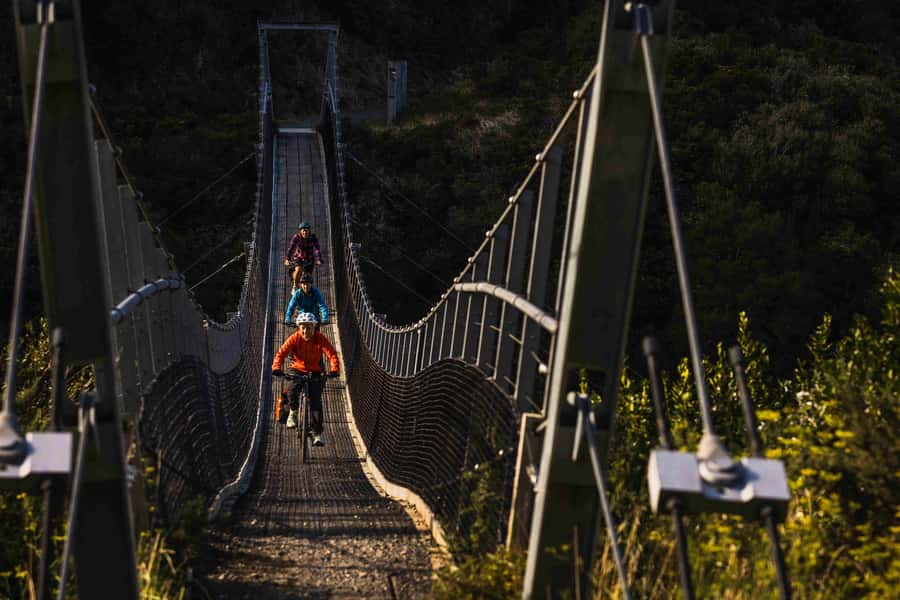
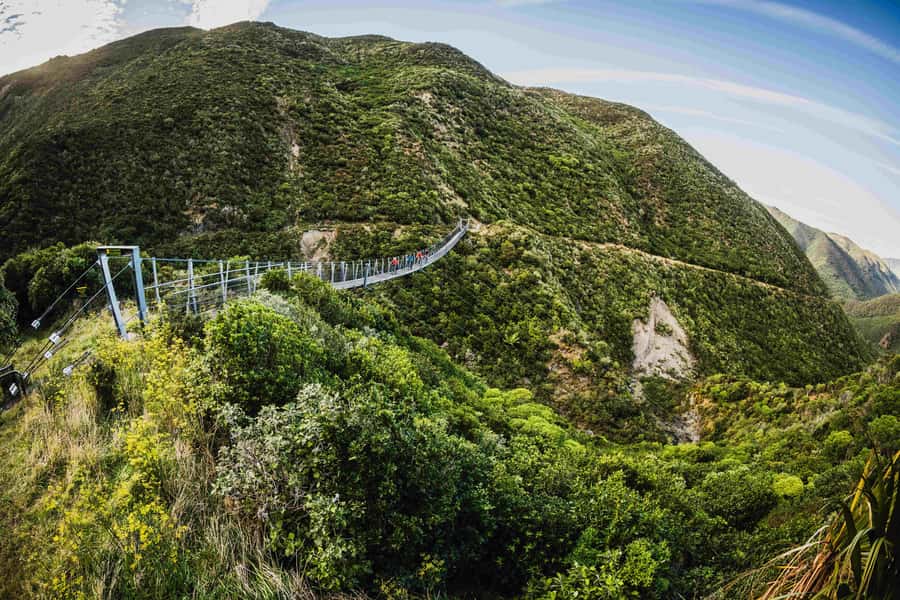
- Swing bridge mountain views, a photo moment that actually matches the effort
- Information boards along the old fell railway, so you understand what you’re riding
- Summit grassy plateau picnic, with time to rest and eat instead of just passing through
- A controlled, fun descent to Cross Creek, with scenery that rewards focus
- Featherston finish on farmland roads, where the last stretch feels more like a local bike ride than a sprint
Entering the Remutaka Rail Trail from Kaitoke
This half-day cycle starts with an easy rhythm: get picked up in Wellington, then get shuttled out to the trail access point at Kaitoke in Upper Hutt. From there, you cycle 28 km that’s described as easy to moderate, and in practice that grading matters. It means you’re not stuck grinding right away, you’re easing into the terrain and letting your legs and bike handling settle in.
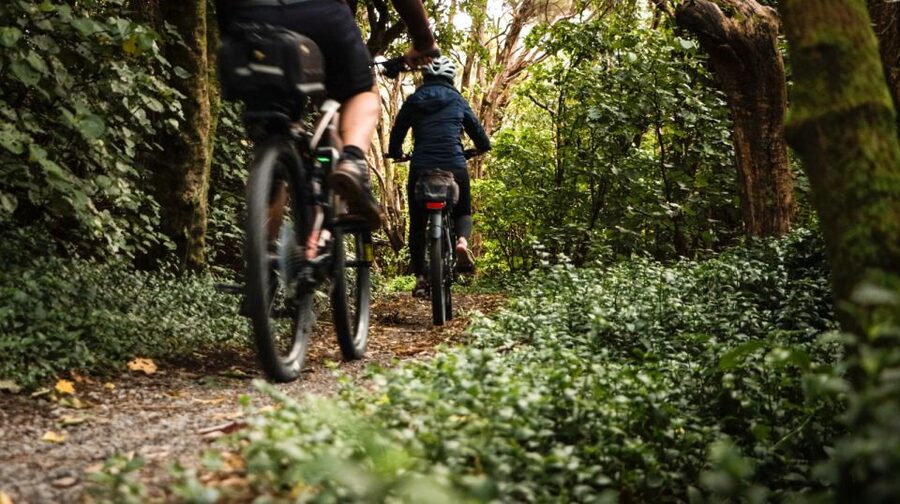
I like that the tour design gives you a first “win” early. You start with a very gradual incline through native bush, which is a nice contrast to the more intense tunnel-and-bridge sections later. It also means you’ll have time to get comfortable with the bike setup, helmet fit, and how the handlebars feel before you hit the more exciting bits.
More Bike Tours in Wellington
- Guided Wellington Tour by Electric Bike
★ 5.0 · 210 reviews - Wellington Electric Bike Rental
★ 5.0 · 159 reviews - Wellington: Guided Sightseeing Tour by Electric Bike
★ 4.7 · 114 reviews
Tunnels and bridges: the fell railway story you can feel
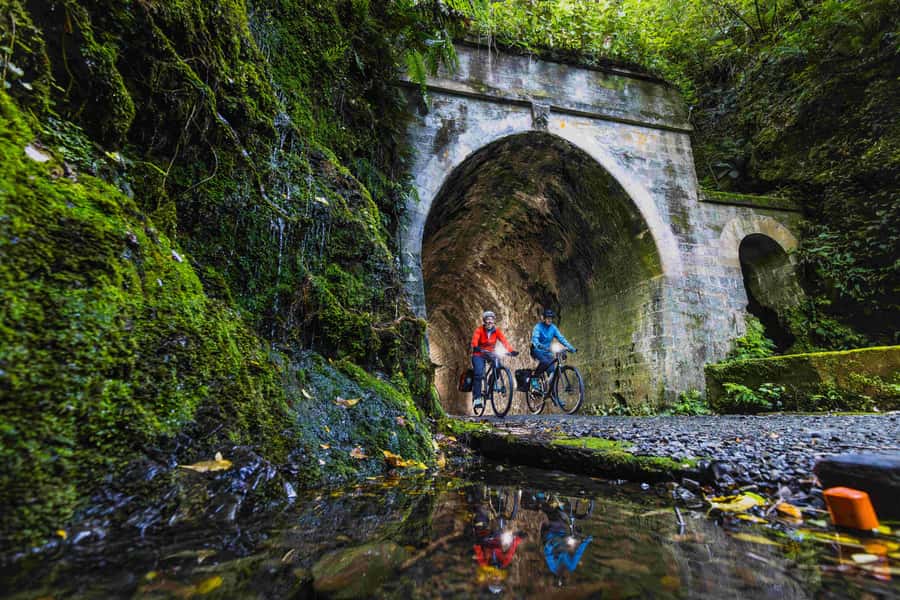
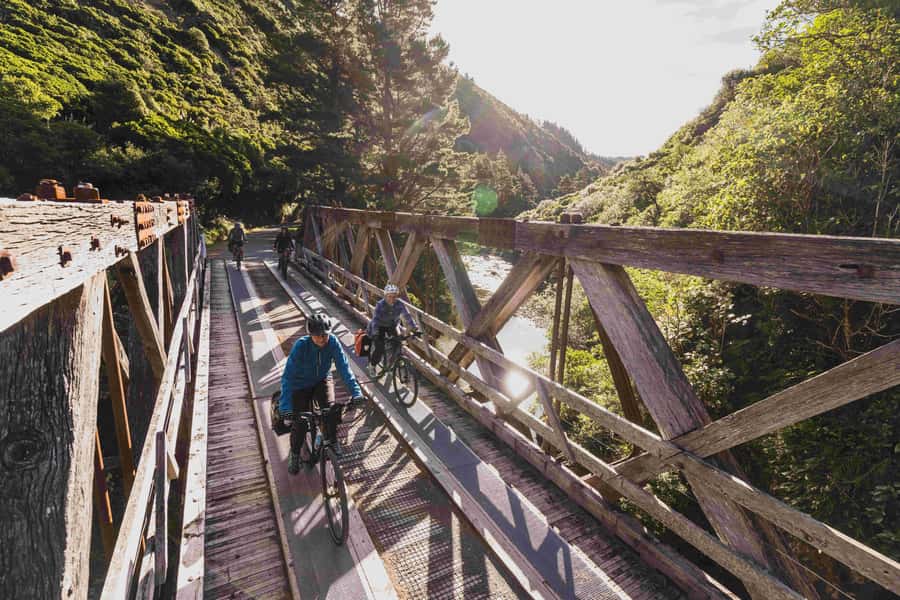
The Remutaka Rail Trail is about more than riding through pretty country. You’re following the route of an old fell railway system, and you see the scale of the engineering while you’re moving through it.
The most memorable part is the tunnels. You’re told to turn on your headlights and go in, and that detail changes the whole vibe. Instead of a vague “there are tunnels,” it becomes an active, sensory experience: dark, confined, and then suddenly opening up again as you exit. If you’re the type who worries in confined spaces, take this as a hint to go steady, keep a calm line, and focus on smooth pedaling.
Then there are the bridges. The best known moment is a swing bridge with mountain views. Whether it’s your first time on a trail bridge or you’ve done a few, it’s the kind of place where you notice why the old railway had to be so clever. The view isn’t just scenic wallpaper. It helps you understand the problem the engineers were solving.
Between these features you’ll stop and look at information boards. Those pauses are one of the best values in the whole day. They turn the ride into something you can actually explain afterward, not just something you photographed.
The summit plateau picnic, where the day finally slows down
After the tunnel and bridge mix, the ride reaches a large grassy plateau at the summit. This is where the tour earns its “half-day” reputation. There’s a built-in break that feels like a reward, not a formality.
You can think of the summit stop in two parts:
- Time to regroup. You’ve already done the climbing and the most mentally demanding parts.
- Food and comfort. You’ll have your packed lunch and water, and you can sit in the grass with enough space to breathe.
The picnic setup matters because it gives you a reset before the descent. In bike rides like this, that reset often decides whether the last part feels fun or stressful. If you’re traveling with a group, this is also where the energy levels equalize. People who pushed a little too hard earlier tend to calm down here.
The descent to Cross Creek: fun, but respect the bike confidence check
Then comes the part that people talk about with a mix of excitement and nerves. You’ll enjoy a descent to Cross Creek in the Wairarapa, surrounded by scenic farmland.
Here’s the honest consideration: one section can feel steep and narrow, with a cliffside sensation and no guardrail or natural barrier in some stretches. In the most cautious read, it’s the kind of terrain that can push an advanced beginner toward “almost intermediate” territory for comfort.
So how do you handle that without overthinking it?
- Keep your speed controlled. This is not a race.
- Stay centered on the bike and use steady braking.
- If you feel your hands gripping too hard, slow down and breathe.
If you come from flatter rides or you’re new to bike trails with exposure, you’ll probably want to assess the terrain before committing to fast lines. The good news is that the descent is described as fun but easily controllable, so your goal is smooth and confident, not speedy.
More bike rides in Wellington:
- Wellington Guided eBike Tour-Cruise Shore Excursion
★ 5.0 · 103 reviews - Wellington Self-Guided Electric Bike Tour
★ 5.0 · 68 reviews - From Wellington: Remutaka Rail Trail eBike Tour
★ 4.9 · 54 reviews - Remutaka Rail Trail Mountain Bike Explorer Cycle Tour
★ 5.0 · 49 reviews
The 2 km single-lane track and why it matters
After Cross Creek, the route includes a 2 km single lane track to reach the car park. Single-lane trail segments can sound minor, but they often change the feel of the day.
This is where you’ll want to think about:
- Space. Passing is limited.
- Your line choice. Narrow trails reward smoothness over sudden moves.
- Fatigue management. Even if you feel strong, your attention span usually dips on these stretches.
It’s not just “more riding.” It’s the transition between the dramatic parts of the trail and the easier, more social cycling toward town.
Featherston finish: farmland roads and a real local stop
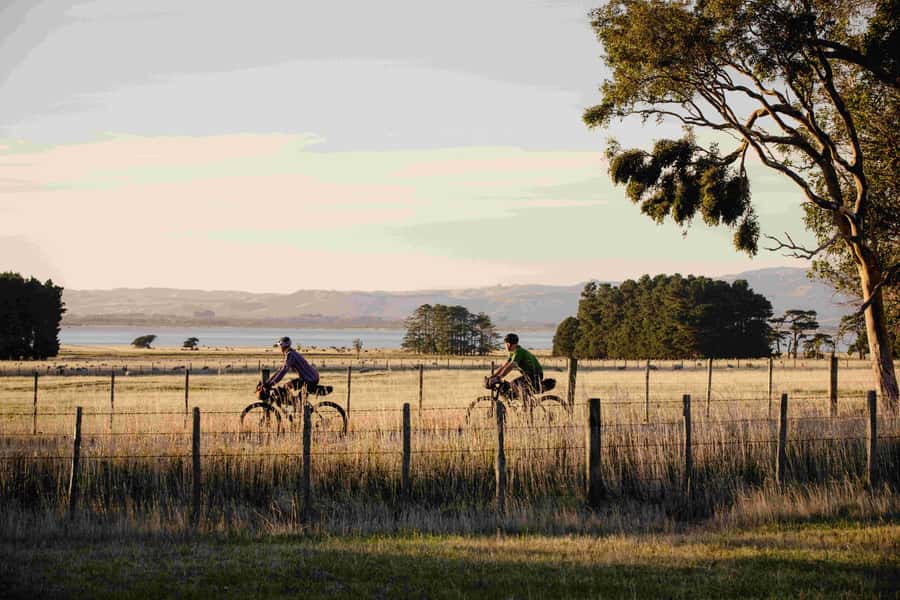
Once you hit the car park, you’re in the final stretch. You cycle along a quiet road using a separate cycle path, moving 10 km north through Wairarapa farmland toward Featherston.
This section is valuable because it gives you something calmer after the tunnel, bridge, and descent intensity. Farmland riding tends to feel open and readable. You can look around, relax your shoulders, and enjoy the rhythm without constantly managing tricky terrain.
Then you have time in Featherston for cafes and pubs, depending on what you’re craving after the ride. You’ll be picked up at 2:15 pm, and that timing is important because it keeps the day from dragging. You’re not left hanging waiting for late arrivals, and you can plan a simple, satisfying stop before you head back.
Getting to and from Wellington without stress
The tour runs from the Wellington area and uses shuttles to set up the ride. You have two pickup options:
- Wellington Station (outside the main entrance)
- Wellington Port for cruise ship guests only (and you’re asked to meet the tour team directly, not another cruise shuttle)
The drive time is part of the day flow, so it helps to think of the full experience as: travel out, ride the trail, cycle into town, then ride back. If you like knowing that the logistics are handled for you, this tour fits the bill.
Drop-off returns you to Wellington Station, or to Wellington Port for cruise guests, in the afternoon. It’s the kind of structure that works well if you’re balancing other Wellington plans the same day.
Bike setup, assist options, and how hard you should train
You’ll ride a mountain bike with a helmet and repair kit included. You’re also given maps and information, plus a GPS tracker and first aid kit for emergencies.
What I think matters most is how the bike level matches your expectations. One key detail from real experience is that sometimes the bike assist level may not match what you assumed when booking, and the team can sort it out on arrival. Because of that, if electric assist is a big part of how you feel about the ride, I’d treat it as a “confirm before you start” item.
In terms of fitness, the route is classed as easy to moderate for the main climbing section. But the descent and narrower track parts mean you also need bike confidence. If you can handle brakes, look through corners, and stay calm when terrain narrows, you’ll probably feel more in control.
What to bring, and how to dress for a tunnel and a picnic
The tour is outdoors, and you’re riding through conditions that can change fast in the Wellington region. Even if the day looks decent at the start, plan for rain.
Bring:
- Closed-toe shoes only
In the real world, I’d also pack:
- A light rain layer, since at least one guide was ready to lend a raincoat when weather turned
- Something small to keep your hands dry and comfortable
One practical note from the experience people describe: when it gets wet, you’ll be glad you had the right clothing. The day can be more enjoyable when you treat rain as part of the plan, not a surprise.
Also, the tour doesn’t use a sandals-and-flip-flops policy, and that’s for a reason. Closed-toe shoes give you better stability on wet trail surfaces and during the single-lane section.
Price and value: is $119 worth your time
At $119 per person for about 6 hours, this tour sits in the middle of the “pay for convenience” range. The value comes from what’s included, not just the ride.
You get:
- Pickup in Wellington
- Bike, helmet, repair kit
- Packed lunch and water
- Maps and information
- First aid kit and GPS tracker
- Shuttle back from Featherston
When you compare that to doing a self-guided bike ride, the difference is clear. You’re paying to avoid the transport headache, get the right gear, and have someone handle safety and route clarity. The summit picnic and the fact that tunnel access includes headlights also tilt the value toward “this is set up for the experience,” not “good luck finding everything.”
If you’re short on time in Wellington and want an outdoors day with built-in story stops and smooth logistics, the price feels fair.
The guide and organization factor you can feel
One of the strongest signals from the experience is that the guide team is both friendly and practical. In at least one case, Sam stood out for being knowledgeable and willing to help on the spot, including lending a raincoat when someone needed it.
That kind of attitude matters on this kind of ride. When you hit tunnels, bridges, and narrow terrain, you want someone who can explain what to expect and keep the mood steady. It also helps when weather changes and plans could get damp fast.
Organization also appears to be consistently strong. That shows up in how clearly the day runs and how smoothly you move from pickup to the trail to Featherston to the afternoon return.
Who should book this Remutaka Rail Trail tour
This is a good fit if you want:
- A story-based ride with tunnels, bridges, and railway info boards
- A half-day plan that includes lunch, so you don’t have to manage food logistics
- A mix of scenery, including Remutaka mountain sections and Wairarapa farmland
It’s not a good fit if:
- You can’t ride a bike confidently
- You need mobility support or are dealing with mobility impairments
- You’re traveling with children under 10
- You’re pregnant
- You’re visually impaired
Also, if you’re nervous about narrow, exposed-feeling downhill trail segments, you can still consider the tour, but take the difficulty warning seriously and ride conservatively.
Should you book this tour?
If you want a Wellington day that feels different from city sightseeing, I think this is a solid choice. You get headlights in tunnels, a real summit picnic, and the satisfaction of finishing with a calmer farmland bike into Featherston. The logistics take the stress out of the day.
I’d only hesitate if you know you struggle with narrow trails or steep, cliffside-feeling descents. If that’s you, talk to the team about your comfort level before committing, and plan on riding slower than your ego wants. Done right, it’s the kind of ride where the views and the history both make sense because you’re experiencing the terrain, not just passing it.
FAQ
Where are the pickup points in Wellington?
You can choose 151 Aotea Quay (Wellington Station) for the station pickup option, or Wellington Port for cruise ship guests only. The tour asks non-cruise guests to use the Wellington Station pickup.
What time do I get picked up?
The pickup at Wellington Station is 9:30 am, and the Wellington Port pickup for cruise ship guests is 9:15 am. Plan to meet your tour team at the stated pickup location.
How long is the bike riding and what distance is on the trail?
After a shuttle to Kaitoke in Upper Hutt, you ride 28 km on the main trail section, then you cycle onward to the Featherston area, with additional shorter trail and road segments included in the overall plan.
Are headlights provided for the tunnels?
Yes. You’re expected to use headlights provided by the tour when riding through railway tunnels.
What food is included?
A packed lunch and water are included. One experience also notes a vegetarian lunch was very good.
What should I wear or bring?
Bring closed-toe shoes. Sandals and flip-flops are not allowed. The tour also provides helmets and a repair kit, and you should expect to spend time outdoors.
Is the tour cancelled if the weather is bad?
Yes. If weather conditions look unsafe or totally miserable, the booking will be called off.
Just added near Wellington
- WLG: Museum of NZ Māori Highlights Tour & General Admission★ 4.7 · 30 reviews
- Wellington Zoo General Entry Tickets★ 3.9 · 7 reviews
- Wellington: Wētā Workshop Creative Classes Experience Ticket★ 4.7 · 5 reviews
- Wellington Helicopters Scenic Harbour Flight★ 4.4 · 19 reviews
- Wellington: Wētā Workshop Guided Transfers & Tour★ 4.6 · 95 reviews
- Wellington: Museum of NZ General Admission★ 4.7 · 156 reviews
- Wellington: Private custom tour with a local guide★ 4.6 · 3 reviews
- Wellington: Half-Day Lord of the Rings Locations Tour★ 4.8 · 10 reviews
Cycling Tours, compared.

The Classic: our most popular electric bike tour of Auckland’s Highlights
Read our review →
Self-Guided Wine Tours by Bike with Lorelle & Greg
Read our review →
Otago Central Rail Trail One Day Wonder Cycle tour
Read our review →
Off Road Quad Bike Adventure Tour in Franz Josef
Read our review →
Browse the lists this tour appears in