
REVIEW · CITY TOURS
Otago Peninsula Scenery and Dunedin City Highlights Tour
A half day of scenery and seabirds. This small-group tour rolls Dunedin city highlights plus an Otago Peninsula drive into one smooth 5.5-hour loop, with live commentary from your driver and a friendly pace for up to 18 people.
I love how the day mixes quick, iconic stops like Baldwin Street with real nature time at the Royal Albatross Centre. I also like that the van is air-conditioned, and you get bottled water and photo-friendly viewpoints along the way. One thing to consider: this option includes free time at the Royal Albatross Centre, but it does not include a guided colony viewing platform, so seeing albatrosses close up is not guaranteed.
You’ll also notice the timing is tight. Early stops are short, and the peninsula drives are the main slow-breath part of the schedule. Guides like Teresa and Warren come up repeatedly for their warm, organized approach, but if you’re sensitive to a fast-moving plan, build in extra patience at the quick stops like Baldwin Street and the rail station photo break.
In This Review
- Key Highlights You’ll Care About
- From Port Chalmers To Dunedin: A Practical Half-Day Plan
- Baldwin Street And Otago Botanic Gardens: Iconic, But Fast
- University Of Otago Photo Stop: Quick Context For The City
- Otago Peninsula By Highcliff And Portobello Road: The Real Scenic Payoff
- Royal Albatross Centre Free Time: What This Ticket Includes
- Dunedin Railways Photo Stop: A Small Pause With Character
- The Guides Make The Day: Teresa, Warren, And The Local Touch
- Transport Comfort, Window Realities, And Photo Tips
- Price And Value: Is $148.94 Worth It?
- Who This Tour Suits Best
- Should You Book The Otago Peninsula Scenery And Dunedin City Tour?
- FAQ
- How long is the Otago Peninsula Scenery and Dunedin City Highlights Tour?
- Where does the tour start?
- How much does the tour cost?
- What is included in the price?
- Is lunch included?
- Does the tour include a guided albatross colony viewing?
- How much time do you spend at the Royal Albatross Centre?
- What are the main stops on the itinerary?
- How many travelers are in the group?
- What if the weather is bad?
Key Highlights You’ll Care About
- Baldwin Street quick-hit at the world’s steepest street, plus time for the botanic gardens
- Otago Peninsula scenic drive via Highcliff and later Portobello Road, with photo stops
- Royal Albatross Centre free time (no guided colony tour included in this option)
- Small-group cap of 18 with bottled water and air-conditioned minivan comfort
- Dunedin city photo moments at the University of Otago and Dunedin Railways
- Driver-led storytelling that ties the city and peninsula scenery together
From Port Chalmers To Dunedin: A Practical Half-Day Plan
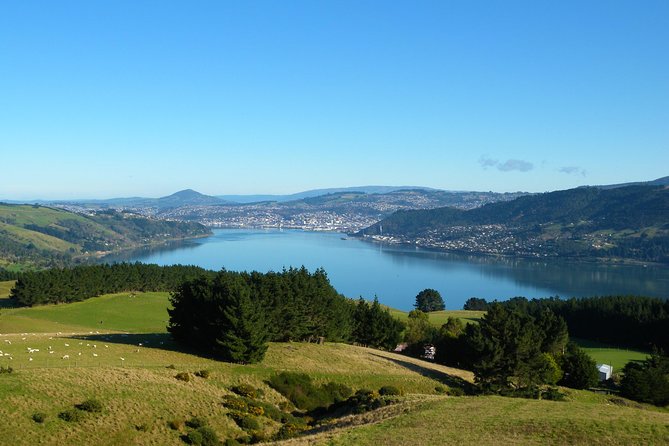
The tour starts in Port Chalmers, then heads into Dunedin and works outward to the peninsula. It’s built for people who want a lot of variety without planning bus routes, parking, or ticket timing. With a mobile ticket and pickup near public transportation, it’s one less thing to manage before you start sightseeing.
The format is a small-group minivan tour, max 18 travelers. That matters because you get live commentary while still having time to step out for the short stops. The duration is about 5 hours 30 minutes, which is long enough to feel like a real outing but short enough to keep the rest of your day free.
If you’re visiting on a tight schedule, this is also a smart way to get your bearings. Dunedin can feel spread out, and the peninsula is a different world from the city center. This tour gives you both, without the stress of self-driving on coastal roads.
More City Tours in Dunedin & Otago
- Garden and City tour
★ 4.5 · 197 reviews - Cruise Dunedin City and Castle Tour
★ 5.0 · 142 reviews - Iconic Shore Excursion: Dunedin City Highlights Tour
★ 5.0 · 131 reviews
Baldwin Street And Otago Botanic Gardens: Iconic, But Fast
The first stop is Baldwin Street, billed as the world’s steepest street. You’re there for about 10 minutes, and it’s exactly the kind of place where the goal is to see it, take a couple photos, and decide if you want to explore further on your own. Even in a short visit, it’s a fun mental check that you’re in a real, specific place, not a generic viewpoint.
Right after that, the tour fits in the botanic gardens. Reviews and highlights emphasize that the gardens are part of the early city experience, with an easy rhythm that works even if your walking time is limited. The gardens are a nice contrast to the steep street angle, since you get greenery and plants without needing to cover long distances.
A small realism note: this is not a long strolling tour. If you want extended time to walk the gardens at your own pace, you’ll likely wish the schedule allowed more minutes. For most people, though, it’s a great sampler that adds depth to the Dunedin portion without eating the rest of your day.
University Of Otago Photo Stop: Quick Context For The City
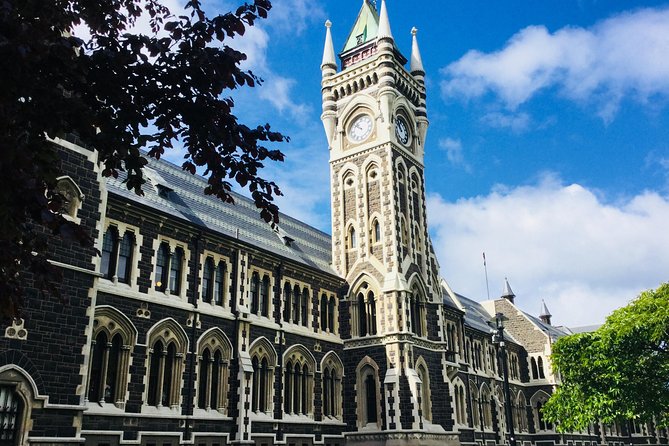
There’s a brief stop at the University of Otago, mainly for photos. This is the kind of “arrive, look around, shoot a few pictures” moment that keeps the tour moving. Still, it helps connect Dunedin’s identity to the students, research energy, and older campus architecture you’ll see across the city.
Even with only a few minutes, it can make your self-guided time after the tour better. You’ll remember the area and recognize it later as you explore on foot or by taxi. If you love city texture, this quick stop is worth it.
If you dislike photo stops or you’re traveling with someone who needs more time at each location, this is where you might feel the schedule squeeze. The tour is simply designed to hit a broad set of highlights rather than linger in one zone.
Otago Peninsula By Highcliff And Portobello Road: The Real Scenic Payoff
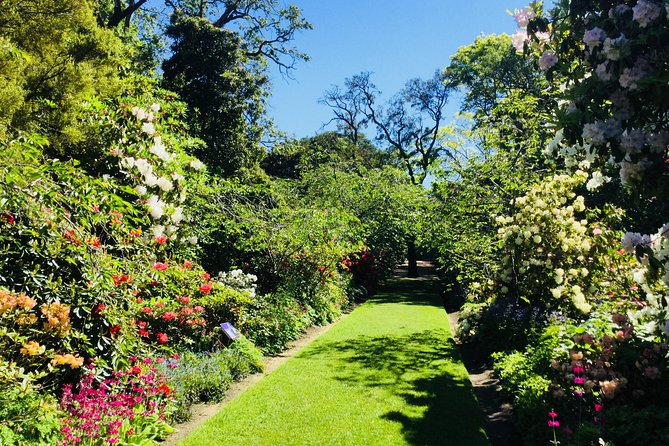
This is where the day settles into its best rhythm. You get about an hour for a scenic drive on the Otago Peninsula via Highcliff, with photo stops along the way. Later, you get another scenic drive stretch via Portobello Road for about an hour.
The value here is not only the views, it’s the routing. Peninsula roads can be slow, and stopping frequently takes effort. Doing it in an air-conditioned minivan with live commentary keeps you relaxed while you still get the “pull over and look” moments. You also get the benefit of a local guide framing what you’re seeing, so the scenery feels connected to the region.
On clear days, the peninsula timing can be a gift for photos. On cloudy or rainy days, it still works because the ocean cliffs, bays, and coastline shape stay visible. The experience can feel different when weather changes, but it doesn’t turn into wasted time the way some outdoor-only plans do.
Practical tip: bring a light layer. Coastal wind can cool you down fast, even when the city feels warm. If you’re using a phone camera, wipe the lens often, since mist and drizzle can show up on small devices quickly.
A few more Port Chalmers trips worth comparing
- Albatross, seals, and sea birds-Wildlife Cruise
★ 5.0 · 189 reviews - Castle, Coast & City Tour – 8 pax max – Castle Entrance Included
★ 5.0 · 102 reviews - Water Taxi and Shuttle to Larnach Castle
★ 5.0 · 100 reviews - Iconic Shore Excursion: Iconic Larnach Castle Tour
★ 5.0 · 93 reviews
Royal Albatross Centre Free Time: What This Ticket Includes
The Royal Albatross Centre is the big wildlife anchor of the tour, but the details of your specific option matter. You’ll have about 30 minutes there, and a guided tour of the albatross colony is not included. The entry itself is also noted as not included, meaning you may need to pay for admission separately on the day.
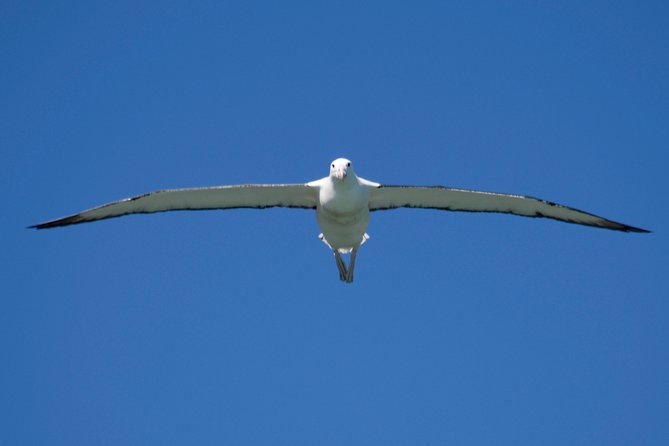
So what should you expect in that half-hour? You get free time at the centre, plus the option to relax at the café for lunch if you want. A lot of people love this stop because the cliffs nearby can be alive with activity, even if you are not part of the guided viewing. In good wind, it’s possible to spot huge seabirds gliding overhead.
That said, albatross sightings are not something any plan can guarantee. Some days they are out and soaring, other days you might see more seals than birds. If you’re hoping for close-up viewing from a guided platform, this exact version may feel like a disappointment.
If you want to maximize the odds, aim to enjoy this stop as a wildlife and visitor-centre experience, not just a guaranteed albatross checklist. Even when albatrosses are flying, the real show is how they move in the air and how the cliffs shape the viewing.
Dunedin Railways Photo Stop: A Small Pause With Character
Near the end of the tour, you get a photo stop at Dunedin Railways for about 10 minutes. This is one of those quick “look, frame it, move on” moments, but it adds variety and keeps the day from feeling like it’s only steep streets and coastline.
Railway architecture also ties back to Dunedin’s long-running connection to transport and industry. Even if you don’t spend much time on-site, seeing it briefly helps your brain connect the city’s history to the places you’ve already visited.
If you’re hoping for a walk-through or indoor time, this stop will feel short. But as a photo break, it’s a solid finishing touch.
The Guides Make The Day: Teresa, Warren, And The Local Touch
What keeps this tour from being a string of stops is how the guide handles the pacing and the storytelling. Reviews repeatedly highlight specific guide names, including Teresa and Warren, for being organized, friendly, and able to explain what you’re looking at. Other guide names like Alva, Arlene, Ross, Alan, and Tree also come up with similar themes: local context, good energy, and a focus on helping you see the best angles.
If you’re traveling with questions, this kind of tour format is ideal. The live commentary gives you a head start, so you’re not just looking out the window without context. And because the group is small, it usually feels less like a lecture and more like a conversation with a good driver.
One practical caution: some people note that time can feel rushed because multiple tours may be joined together. That doesn’t mean the guide is bad, it just means the plan may run tightly. If you’re the type who needs extra seconds to take photos or read signs, this is where a calm mindset helps.
Transport Comfort, Window Realities, And Photo Tips
The tour includes transport by air-conditioned minivan, with bottled water and live commentary. That’s a big deal in New Zealand, because weather can shift fast, and you can go from sun to drizzle in an hour.
A small downside shows up in feedback about van windows. Some seats can have limited views, especially if you’re not sitting closer to the window or if condensation happens on rainy days. If photos matter to you, pick your seat wisely when you board, or at least position near a clearer window area if the driver allows.
Also, plan for the fact that your time on foot is limited. You’re stepping in and out for short stops, then back into the van. Good walking shoes help, especially around streets like Baldwin Street where surfaces can feel steep and uneven.
Price And Value: Is $148.94 Worth It?
At $148.94 per person, you’re paying for a guided half-day plan that covers transport, live commentary, and structured stops across Dunedin and the peninsula. That’s value if you would otherwise have to piece together multiple rides, pay for separate tours, and still worry about timing.
But you do need to budget for what is not included. Lunch is not included, and admission at the Royal Albatross Centre is noted as not included for this option. If you plan to eat at the café, factor that into your total cost.
Where the value really lands is in the combination. You get a steep-street and botanic-gardens introduction to Dunedin, then real coastal scenery, then a wildlife-focused stop. If you were to drive yourself, you’d still need to decide where to stop and how long to linger, and that’s the type of planning this tour handles for you.
For most people, this price makes sense when you want convenience and interpretation more than you want maximum time at one location.
Who This Tour Suits Best
This is a good fit if you:
- Want a compact overview of Dunedin plus the Otago Peninsula in one day
- Prefer small-group comfort over crowded buses
- Like guided context, especially on local streets and nature viewpoints
- Have moderate fitness needs, since there’s some walking but it’s not described as a long hike
It may be less ideal if you:
- Hate rushed schedules or want lots of independent time at each stop
- Are specifically chasing close-up albatross viewing with a guided platform, since this version does not include that colony viewing tour
If you’re celebrating a first visit to the area, this is also a strong “start here” choice. You’ll learn what’s worth repeating later on your own.
Should You Book The Otago Peninsula Scenery And Dunedin City Tour?
I think this tour is a smart booking when you want balance: city texture, famous Dunedin quirks, and peninsula scenery, all in one organized run. The top reason to go is the structure. You get the must-see highlights and you still get enough nature time to feel like you actually left the city.
Before you book, set your expectations about the Royal Albatross Centre. With free time only and no guided colony viewing included, you may see albatrosses, but you should not treat it like a guaranteed close encounter. If that’s your top priority, it’s worth checking whether a different albatross option offers the guided viewing platform.
If you want an easy, scenic half-day with guides such as Teresa and Warren who keep things friendly and on track, this tour is an excellent fit.
FAQ
How long is the Otago Peninsula Scenery and Dunedin City Highlights Tour?
It runs for approximately 5 hours 30 minutes.
Where does the tour start?
The location listed for the tour is Port Chalmers, New Zealand.
How much does the tour cost?
The price is $148.94 per person.
What is included in the price?
Transport by air-conditioned minivan, a driver/guide, bottled water, and live commentary on board are included.
Is lunch included?
No, lunch is not included. There is an option to buy lunch at the Royal Albatross Centre café during free time.
Does the tour include a guided albatross colony viewing?
Not in this option. The Royal Albatross Centre stop includes free time, and a guided tour of the albatross colony is not included.
How much time do you spend at the Royal Albatross Centre?
You have about 30 minutes there for free time.
What are the main stops on the itinerary?
You’ll visit Baldwin Street, a photo stop at the University of Otago, scenic driving on the Otago Peninsula via Highcliff and later via Portobello Road, the Royal Albatross Centre, a photo stop at Dunedin Railways, plus short breaks along the way.
How many travelers are in the group?
The maximum group size is 18 travelers.
What if the weather is bad?
This experience requires good weather. If it’s canceled due to poor weather, you’ll be offered a different date or a full refund.
Just added near Port Chalmers
- Water Taxi and Shuttle to Larnach Castle★ 5.0 · 100 reviews
- Shore Excursion: Dunedin City, Otago Peninsula, Castle Gardens & Olveston Tour★ 5.0 · 81 reviews
- Harbour, Albatross and Wildlife Cruise on Otago Harbour★ 4.5 · 22 reviews
- Clearwater Private Penguin & Wildlife Tour from Port Otago (5hrs)★ 5.0 · 7 reviews
- Castle, Coast & City Tour – 8 pax max – Castle Entrance Included★ 5.0 · 102 reviews
- Dunedin Nature & City Tour – Full Day Cruise Excursion★ 4.5 · 87 reviews
- Otago Peninsula Tour and Larnach Castle City Sights (min 4 )★ 4.0 · 5 reviews
- Dunedin Shore Excursion City Sightseeing & Tour of Larnach Castle★ 4.0 · 66 reviews
City Tours, compared.
Half-day Discover Auckland City Sightseeing Tour
Read our review →

2025 Award Winning: Auckland City Highlights Half Day Tour
Read our review →
Arrival Transfer: Auckland Airport to Auckland Central City Centre
Read our review →
Browse the lists this tour appears in